Menu

Exp. 1: Manual Metal Arc Welding (MMAW)


Aim of experiment


To measure joint efficiency at various welding conditions and determine corresponding mechanical and metallurgical properties.


About experiment


1. To study the submerged arc welding process.

2. To understand the effect of process parameters on the weld bead geometry and mechanical
    properties.

3. To understand the effect of process parameters on the weld bead geometry and mechanical
    properties.

4. To understand the effect of process parameters on the microstructural properties.


Theory


Manual metal-arc welding (MMAW) is one of the oldest, simplest, and most versatile joining processes. About 50% of all industrial and maintenance welding currently is performed by this process. The electric arc is generated by touching the tip of a coated electrode against the work piece and withdrawing it quickly to a distance sufficient to maintain the arc. The electrodes are in the shapes of thin, long rods (hence, this process also is known as stick welding) that are held manually. The heat generated melts a portion of the electrode tip, its coating, and the base metal in the immediate arc area. The molten metal consists of a mixture of the base metal (the workpiece), the electrode metal, and substances from the coating on the electrode; this mixture forms the weld when it solidifies. The electrode coating deoxidizes the weld area and provides a shielding gas to protect it from oxygen in the environment. A bare section at the end of the electrode is clamped to one terminal of the power source, while the other terminal is connected to the work piece being welded. The current, which may be DC or AC, usually ranges from 50 to 300 A. For sheet-metal welding, DC is preferred because of the steady arc it produces. SMAW is best suited for workpiece thicknesses of 3 to 19 mm (0.12 to 0.75 in.), although this range can be extended easily by skilled operators using multiple-pass techniques.


Procedure


1. First perform edge preparation on the pieces to be welded.

2. Clamp the two pieces in proper fixture else in absence of fixture perform tack welding at two end.

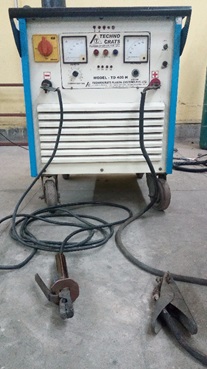
3. Now take an appropriate welding rod and set the welding current according to it.

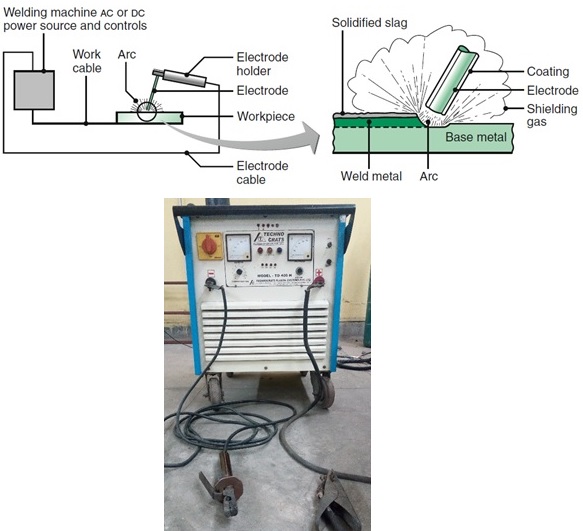
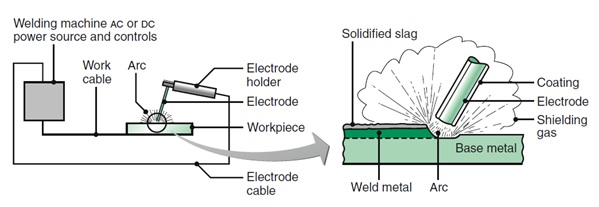
4. Now connect the clamp with the work table first to get the power connection from the machine.

5. Next fix the electrode in holder and keep it vertically just above the parts to be welded.

6. Now touch the electrode tip with the job piece momentarily to complete the electrical circuit facilitate
    arc initiation and maintains a gap of <5 mm between the electrode and job for arc continuity.

7. Move the arc along the weld line till the completion of first bead.

8. After completion let it cool for a while and remove the solidified slag layer by chipping.

9. In case of multi pass welding perform the next welding only after cleaning the slag properly.


Precautions


  • Always use proper protective equipment while performing this process.

  • Make sure the clamping is proper with the worktable and got proper earth in.

  • Never touch partially used electrode and any job piece kept at worktable as they may be hot.

  • Edge preparation and face matching is necessary for a good penetration.


  • Quiz

    Will be uploaded very soon


    Tutorial


    References


    1. 1. Kalpakjian, S.; Steven, R. S. Manufacturing Engineering and Technology; Prentice Hall: New Jersey,
          2010; 6th ed.

    2. 2. ASM Handbook: Vol. 9 Metallography and Microstructures; Materials Park, OH: ASM International,
          2004


    Live Support


    ×